We acknowledge the Traditional Owners of the land on which the Queensland Art Gallery | Gallery of Modern Art stands and recognise the creative contribution First Australians make to the art and culture of this country.
Workshop
This workshop will take you through the steps of creating your own pigments by sustainably sourcing local, natural materials. It is designed to make you think more about where your materials come from, rather than what you make with them.
Watch D Harding demonstrate the pigment making process.

1. Renaissance watercolours were made by grinding and combining pigment with water containing gum arabic (tree sap or resin that is soluble in water). Similarly, you can make your own watercolour paint by sourcing and mixing pigment with the sap of an acacia or grevillia tree. Before you begin gathering suitable materials, research your local area to learn about its Indigenous story. Consciously plan to leave an exchange for anything that you take. For instance, you might:
- remove rubbish you find on the walk
- water a small plant as you go
- take the time to be still and listen closely to what’s around you
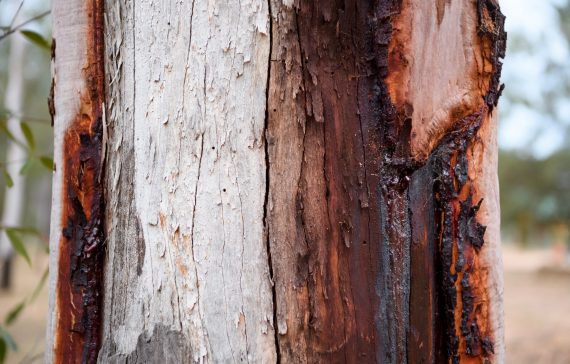
2. Learn how to identify acacias (also known as wattle) and grevillias (also known as silky oaks). Both of these species are prominent in Australia and you should be able to find some around your school or local area. Collect crystallised sap from a tree or research how to tap a tree for sap (note this will require the supervised use of a sharp knife and may take a few days to extract the resin).
Alternatively, you can purchase gum arabic through an art supply store which comes in crystals or a fine powder

3. Select friable rocks that are easily ground into coloured powder. Look for a range of colours within the stones.
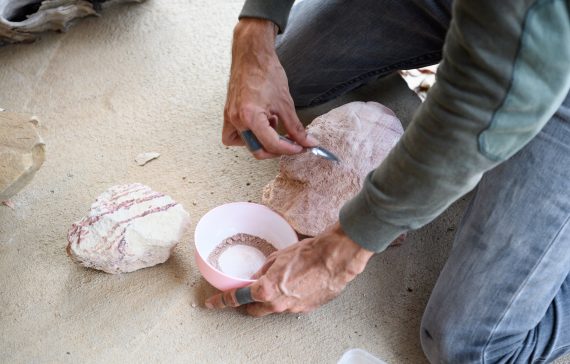
4. Scrape the pigment into a bowl for mixing. Use the back of a spoon to crush the pigment into a powder. A consistently fine powder will produce a paint that is easy to apply.
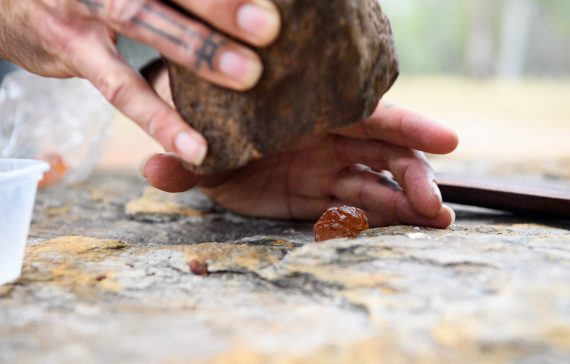
5. Place the sap collected from an acacia or grevillia into a separate container and crush into smaller pieces if needed. If you are using gum arabic, this often comes as a fine powder. Simply place a small amount into a separate container.

6. Soften the crystals into a gel by pouring in a small quantity of boiled water. Allow time for the crystals to melt and add water as required – be careful not to dilute your mix. Stir the mixture together to form a gel.
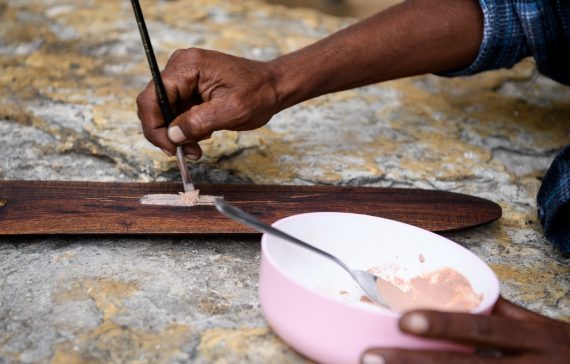
7. Mix the gel with the pigment to create your own paint. You can work directly with the pigment immediately after mixing.

8. Repeat the process with other rocks to create more colours.

9. To create watercolour pans, pour your colours into an ice cube tray and allow them to set. Once set, scrape a small amount of the colour onto a palette and add water to dilute. Allow the colour to blend with the water as you paint.

10. With a supply of paints you can revisit the area where you sourced the pigment and paint what you see there. If possible, take a group of friends or family and invite them to use your paint.